This post may contain affiliate links to products or services mentioned, and we may receive an affiliate commission for any purchases made by you on the affiliate website using such links.
Especially when my mom comes to help! This past weekend, that’s just what she did, and my freezer is stocked with ready-to-cook meals, as well as heat-and-eat breakfasts, for the next few months when cooking might prove difficult. I tend to have a LOT of preterm contractions and have ended up on bedrest in the past so this is one thing we did last time around to help keep things going when I couldn’t keep going. It’s a great idea if you know someone on bedrest, too! In one afternoon and the next morning, we made:
- Chicken Pie with Club Crackers
- Chicken Divan
- Poppyseed Chicken
- Chicken Spaghetti
- Chicken and Sausage Gumbo
- Spaghetti Sauce
- Beef Stroganoff
- Meatloaf
- Breakfast Burritos
- Individual Sausage Loaves
- Pumpkin Chocolate Chip Muffins and
- Bread Machine Cinnamon Rolls.
I’ll be sharing the recipes in the coming weeks (and will link to them from here when I do), but today I wanted to tell you a little bit about the process we used and give you a few helpful hints.
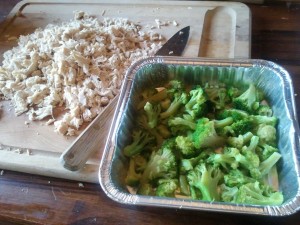
First, when planning what to cook on a freezer cooking day, I try to find recipes that require many of the same ingredients. You probably noticed the number of chicken dishes we prepared, right? The reason is that you can boil (or bake) all the chicken together at once then just divide it up. (Just be sure to have enough at the outset or your mom might have to make a mad dash to the grocery store…sorry, Mom.) Several of our recipes also called for sour cream, chopped onions and peppers, etc. We just chopped all the veggies at once and put them in bowls for each recipe.
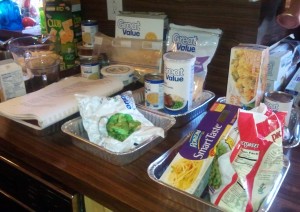
While the chicken was cooking, we organized the ingredients. We placed each set of ingredients in the dish we would use for the recipe and placed the recipe on top. Like so:
We kept the kitchen table clear for chopping ingredients and assembling the items….like so:
You might notice that I used two small square dishes instead of a large 9×13 pan for each recipe. I like to have just enough for one dinner for our family, and right now, this is the perfect amount for us….though that will be changing soon, I imagine. (Note: you might need to increase ingredients in your recipes slightly to accommodate the two pans.)
After assembling one recipe, I wrapped each pan in cling wrap then aluminum foil, writing the name of the dish and the instructions on top of the foil with a permanent marker. Be sure to be specific about the instructions…especially if you are like me and expect that your husband will be the one attempting to follow them.
Individual items like the burritos and sausage loaves were wrapped in foil and then placed in large ziplocs. Muffins and cinnamon rolls were flash frozen on cookie sheets then placed in ziploc bags. They can be removed one at a time, wrapped in a napkin and heated in the microwave.
The gumbo, spaghetti sauce and beef stroganoff were divided into meal-size portions and frozen flat in gallon size freezer bags.
Y’all, my freezer is FULL!
For more helpful hints and some recipes, here are a few sites I find helpful:
Look for the recipes to the dishes above in the coming weeks, and give freezer cooking a try!
 Also, visit WeAreThatFamily.com each Wednesday to see what’s working for a whole lot of other people!


I just did my first once-a-month cooking session this past weekend with the help of my sister. Most of our dishes were ground beef, but we did a little chicken for variety 😉
I’m so excited about having all that food in the freezer!